
Sketching is one of the most fundamental ways to express creativity, whether you’re drawing a landscape, a city scene, or an abstract composition. It all begins with a simple line that gradually builds into a complete and expressive piece of art. The key to a well-structured sketch is to follow a clear process, layering elements step by step. In this guide, we will go through five essential steps to help you create a balanced and visually appealing sketch, starting with defining the sky and bottom before progressing through shapes, color, lighting, and details.
If you want to start your sketch with color, I have an amazing tutorial for you. You can find it here.
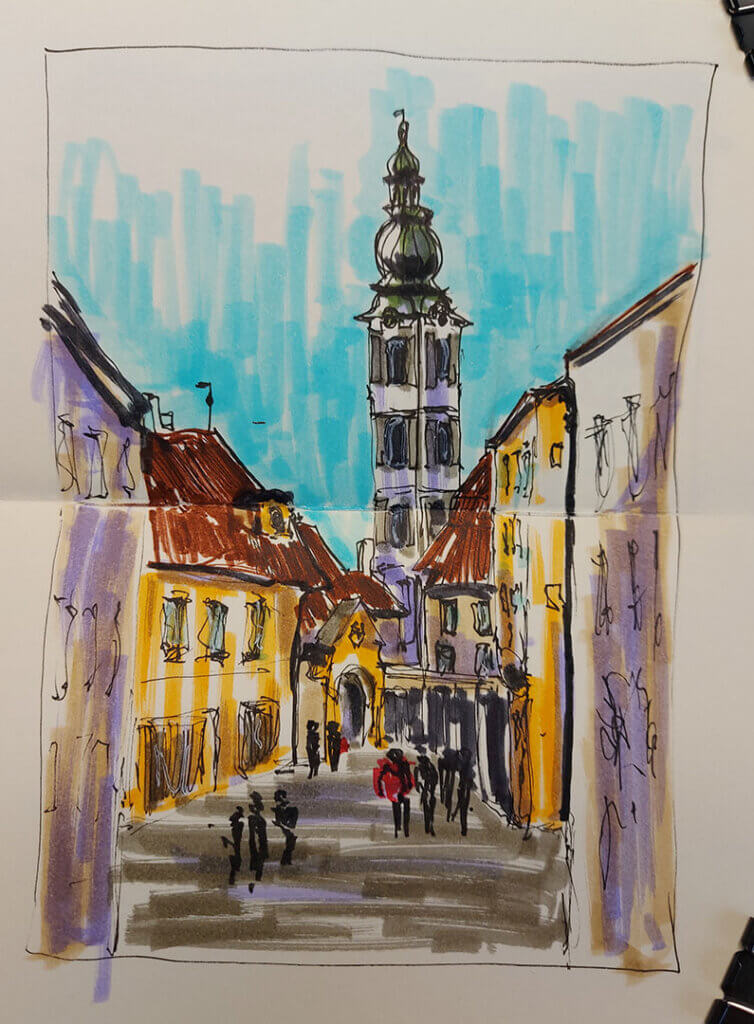
Materials I use in current sketch of Cesky Krumlov are Tombow dual brush pens and Micron pen.
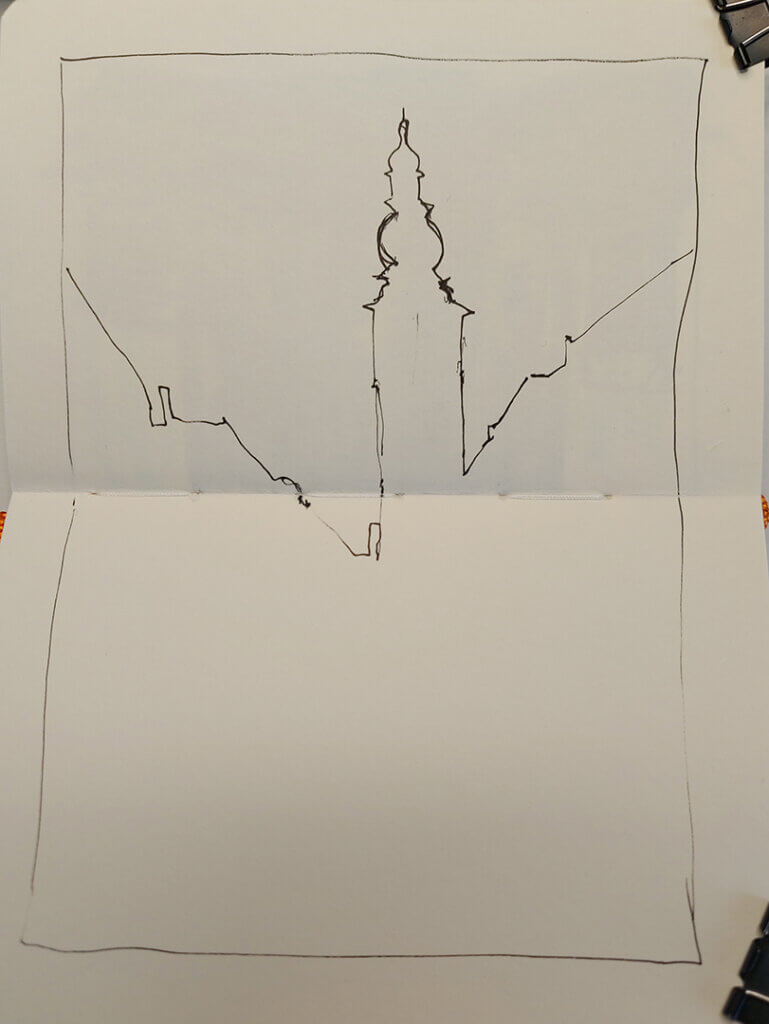
Make a Contour Line to Define the Sky and the Bottom
The first step in any sketch is to establish a clear separation between the sky and the bottom of the composition. This contour line acts as a foundation, providing structure and depth to your drawing. In a landscape, this might be a horizon line that determines where the land meets the sky, while in an indoor scene, it could be the surface of a table or a floor. A well-placed contour line helps maintain proper proportions and creates a natural flow for the rest of the composition.

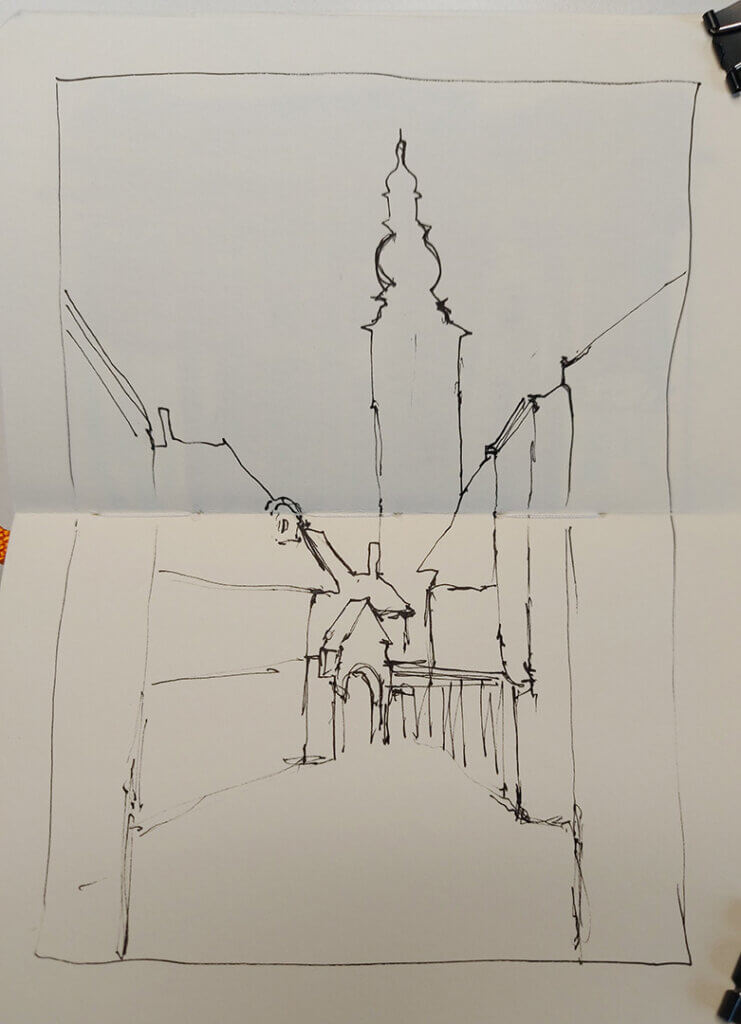
Draw the Silhouette of the Shapes
Once the sky and bottom are established, begin sketching the general silhouettes of the objects in your scene. Focus on outlining the major shapes, whether they are mountains, buildings, trees, or figures. At this stage, the details are not important—what matters is capturing the overall structure and balance of the composition. Keep your lines loose and confident, adjusting the shapes as needed to create a visually pleasing arrangement. Silhouettes define the main forms and help establish depth and scale before moving on to more detailed work.
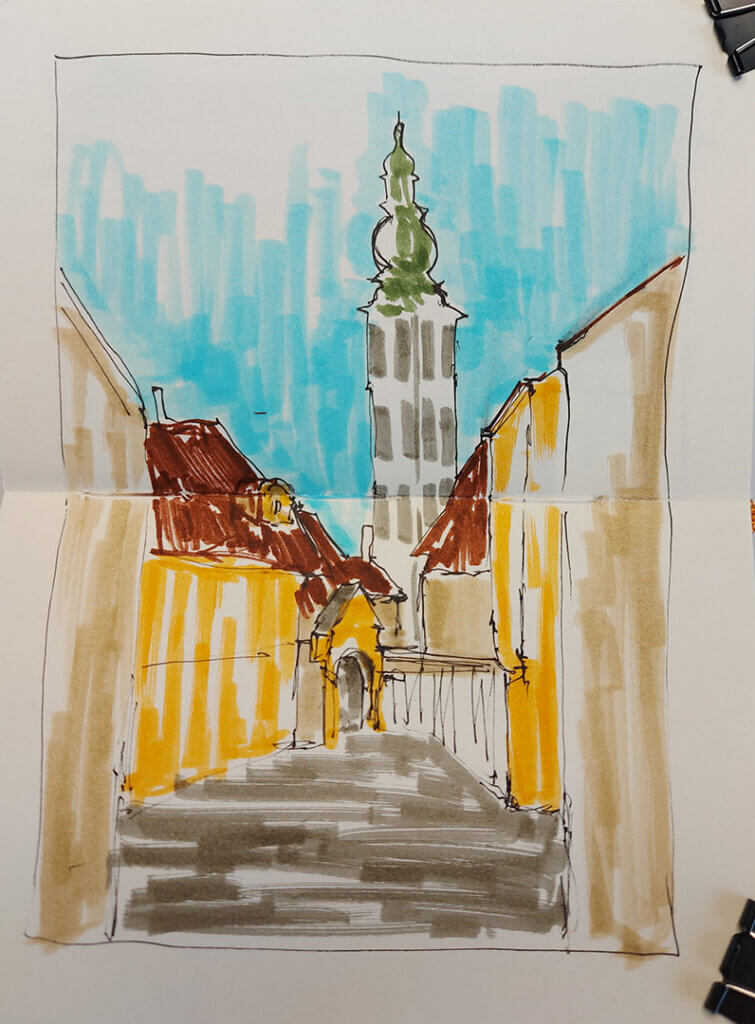
Add Color to the Sketch
Now that the basic structure is in place, it’s time to introduce color to bring the sketch to life. Whether you are using colored pencils, markers, or digital tools, start with a light base layer of color to establish the overall mood. For a natural look, use soft transitions between colors and avoid harsh, saturated tones too early. Think about the relationship between different areas—sky tones should complement the bottom section, and objects should have a cohesive color scheme. Even if the final piece will be monochromatic, shading in different values at this stage helps to create visual depth.
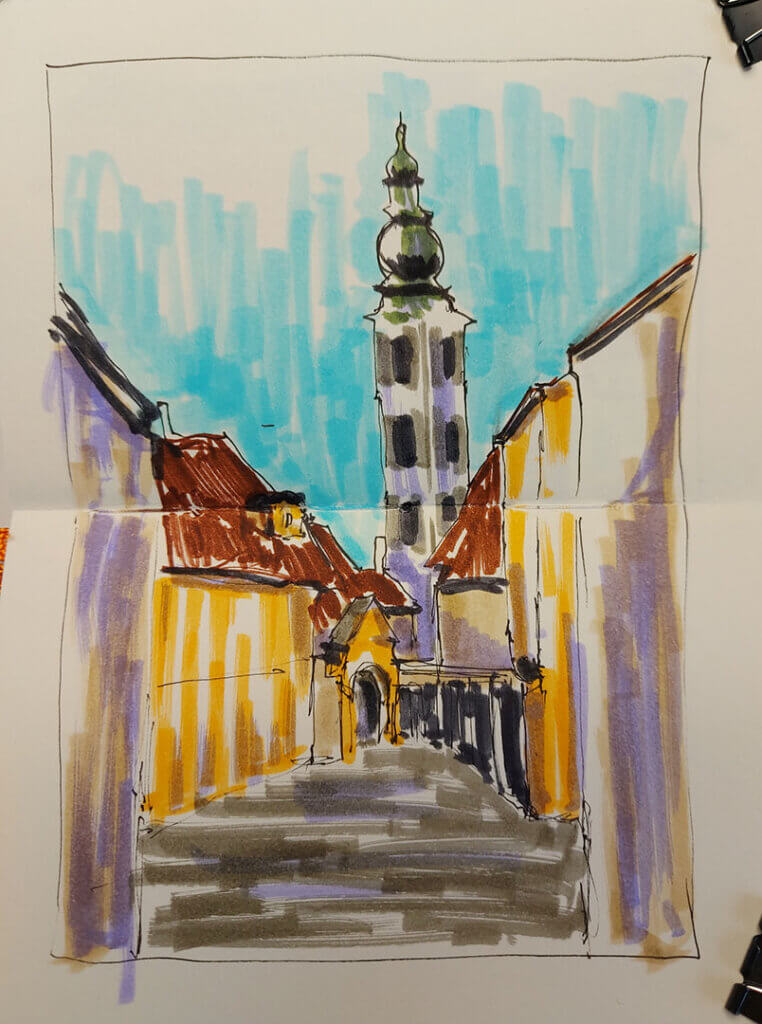
Add Light and Shadows
To make your sketch more dynamic, add shading to define light and shadow. Identify the primary light source and determine where shadows would naturally fall on objects. Use hatching, cross-hatching, or soft blending techniques to create contrast and depth. Lighter areas should have softer edges, while darker regions should be more defined to enhance three-dimensionality. By carefully placing highlights and shadows, you create a sense of realism and volume, making the sketch more engaging to the viewer.
Add Details for Final Refinement
The final step is refining the sketch by adding small details that enhance the overall composition. This could include textural elements like rough tree bark, brick patterns, or subtle facial features if you’re drawing a character. Use fine lines and controlled strokes to define edges and enhance clarity. Be mindful not to overwork the sketch—too many details can make the drawing feel cluttered. Instead, focus on areas that naturally draw the eye, ensuring a balanced and polished look.
Creating a compelling sketch is all about following a structured approach, starting with simple lines and gradually building complexity. By first defining the sky and bottom, then layering silhouettes, color, lighting, and details, you can develop a balanced and engaging composition. Each step plays a crucial role in enhancing depth and realism while maintaining a clear structure. With practice, this process will become second nature, allowing you to create expressive and visually stunning sketches with confidence. So pick up your pencil, follow these five steps, and start bringing your ideas to life!